Foothill Flyers Radio Club - W6FHF
Foothill Flyers Home Page
Radio Club
Ham Radio Procedures
TYT TH-7800 Notes
Btech UV-25X4 Notes Baofeng UV-5R Notes
On this Page:
Base Radio
Coax cable
Thru The Wall
Antenna
Power Supply
Last update August 19, 2023
Click on images to enlarge
Ham Base Station Notes
By Tom O'Hara W6ORG
 Setting up a base station at home can greatly improve your ham radio operating experience. You will need to put a good omni directional antenna on the roof and run coax cable down into the house ending up at your operating position. You can in the beginning use your walkie talkie with charger connected and hooked to the roof antenna. However, long term you will want to add a 25-50 Watt dual band transceiver and companion 13.8 Vdc power supply. Below are the steps with links to the suggested sources of parts and equipment.
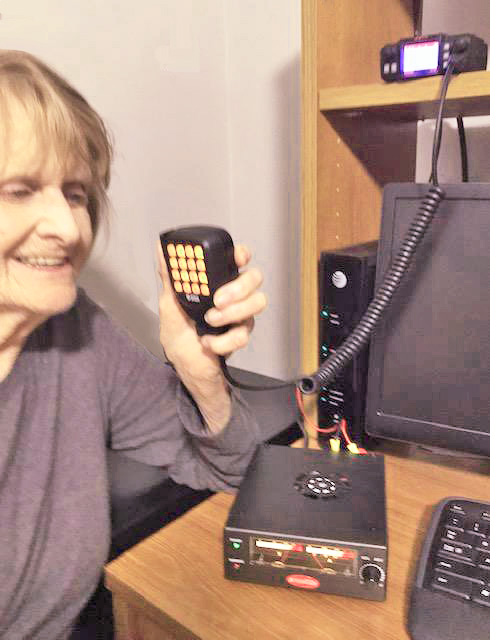
← Mary, KN6BPY, in La Crescenta talks with Maria, KG6REG, in →
Monrovia via a mountain top repeater using their base station transceivers connected to an antenna on the roof.
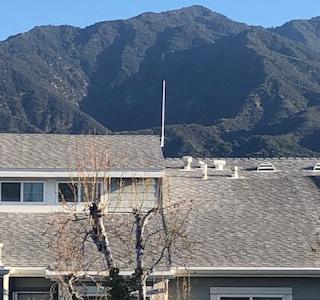
Putting up an antenna on your roof can greatly increase your signal strength for both receiving and transmitting plus give more constant results than trying to find that magic spot in your house or yard with your walkie talkie. The height reduces the number of buildings, trees, cars, people, etc., that your signal has to go through to get to the repeater and vice-versa, and may even be line of sight to the repeater. So what do you need to put an antenna on your roof?
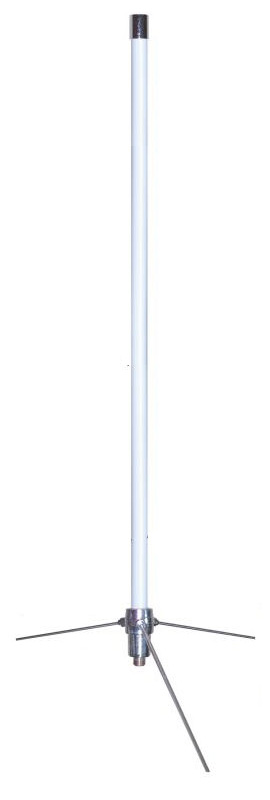 Antenna - The Jetstream JTB6 is a rugged antenna that covers the 144-148 VHF and 440-450 MHz UHF Ham bands with 3 dB gain (doubles the power) on VHF and 5.5 dB on UHF. This more than makes up for coax cable loss. It gets it's gain by concentrating the vertical omni directional radiation pattern on the horizon rather than up high in the sky. Mounted in a fiberglass tube, the length is 4' 7" and can take up to 90 mph winds. There are others that are longer and have more gain but higher shipping cost. If you want to also transmit on the 223 MHz band with the Baofeng UV-5R3 or Btech UV-25X4, then get the Comet Tri-band antenna.
Jetstream JTB6 146/446 MHz, $39.95 + $18.14 shipped from R&L Electronics.
Jetstream JTB3B 146/446 MHz, 6ft long, 4.5.7.2 dB gain, $44.95 + shipping.
Comet CX333 Tri-band 146/222/445 MHz, 10' 4" 6.5,7.8/9.0 dB gain, $178.89+
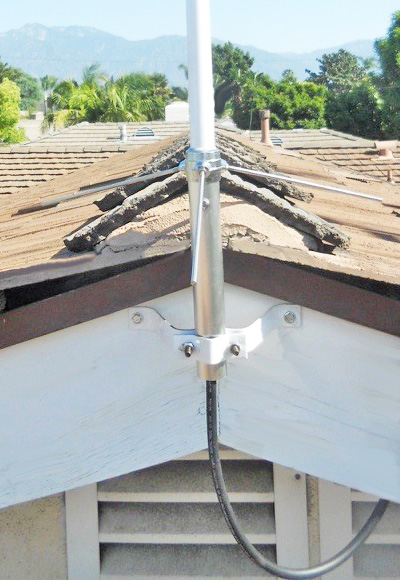 Antenna Mounting Bracket - The bracket clamps to the bottom of the antenna and bolts just below the peak of the roof with supplied wood screws. Use a drill bit to make a pilot hole to minimize splitting the wood with the mounting screws. Place the bracket level and as high up as possible on the peak, then mark and drill the holes. Fasten the bracket and check for level as the antenna needs to be perpendicular to the ground for best omni directional radiation pattern on the horizon. One bracket is fine for this size of antenna, but you can put the second one directly below the first for added wind strength. Run the coax cable up through the antenna mounting sleeve and then connect the coax cable to the antenna. Water inside the coax can ruin it so put two wraps of electrical tape around the connector at the antenna starting on the coax, up the cable connector to the base of the antenna jack and back down again. Slide the sleeve up and fasten with the bolt. Mount the antenna to the bracket. Make a drip loop by bringing the coax back up and under the eves so as not to conduct water down to the wall entry. The cable can be routed under the eves and down next to windows for least visual exposure.
Home Depot $14.06 or Amazon $13.92
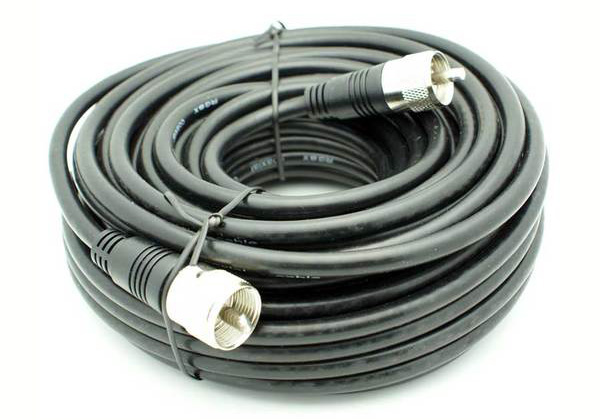 Coax Cable - CNT-400 or LMR-400 are special low loss 50 Ohm cable that is 4/10 inch diameter and connects the antenna on the roof to your radio inside the house. At VHF and especially at UHF frequencies you can lose almost half (2.7 dB) of your RF power per 100 ft with this coax cable. So measure the distance with a string then select the next longer 25 ft incremental length. Ideally to minimize cable loss, the coax is cut to the minimum necessary length and connectors are then put on, but that involves soldering and proper assembly. The suggested ready made coax source is Ham Radio Outlet in Anaheim using Andrews Cinta CNT-400 low loss coax.
CNT-400 Coax with PL259 UHF Male connector both ends: 25 ft 400C25, 50 ft 400C50
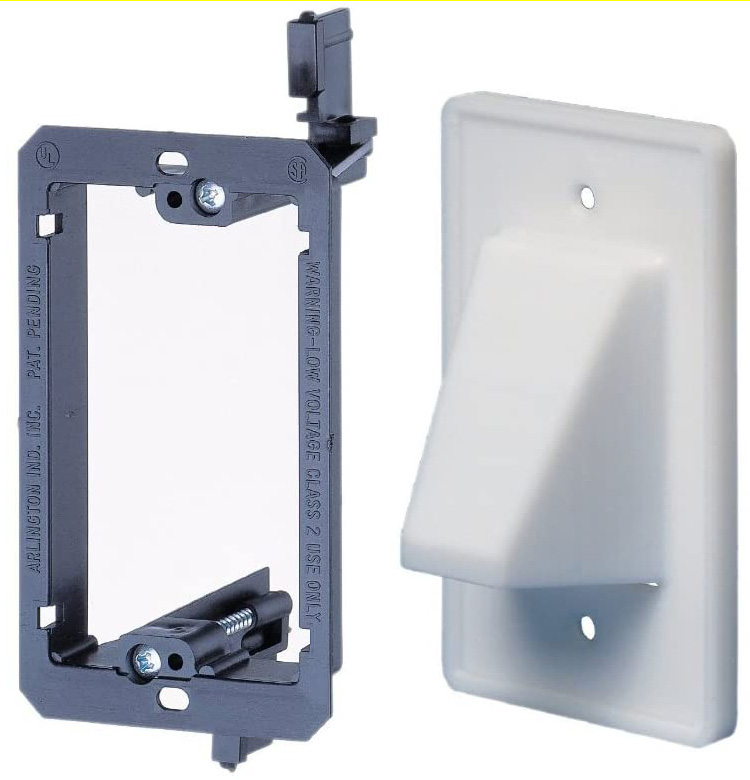
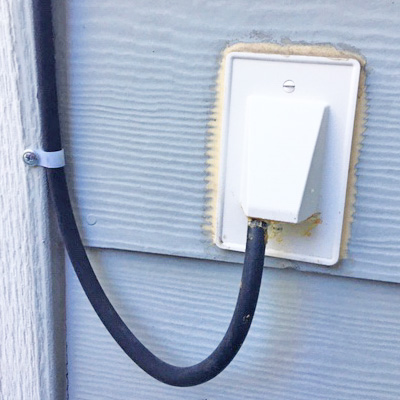 Getting the Coax into the house - Yes, the best way is just to bite the bullet and drill/cut a hole in the wall vs. trying to find a vent under the eves and then go up in the attic to drill a hole in the ceiling above the ham operating position. It is really not that hard. Go to Home Depot and get a 3/8 masonary drill bit and a drywall saw. Find a spot between the studs with a stud finder or take a guess by the old tap method. Make sure no wall sockets are on the inside wall within the width between the two studs. After marking the outline on the outside wall, (inside of the mounting bracket) drill out an upper corner just inside the line all the way through to the inside wall. Cut just outside the line with the drywall saw. Mark and cut the inside wall hole. If you are in to tools, you can also use an Oscillating-Multi-Tool. If you click on the link below for the wall fixture and scroll down, you will find the info and steps to take for the installation, however, the wall fixture opening points outward and down as shown in the photo above, not inward, and put some sealant under the top and sides.
Coax Thru-the-wall Fixture from Amazon $10.79 for a package of 2.
- Coil up the excess coax in the house. Once you are satisfied with the placement of your radio, secured the routing of the coax outside the house and checked the operation on the air, shoot a little Spray Foam into the wall fixture on both sides to keep moisture and the creepie crawlies out.
- Walkie Talkie - The Baofeng UV-5R antenna has a SMA Female connector. Unscrew the antenna and either screw in a SMA Female to UHF Female adaptor into the radio, or a short flexible adaptor cable to take a lot of mechanical force off the small connector from the large antenna coax. Dress and fasten the coax so that the walkie talkie does not move out of the charger. The charger can be velcro'd to the desk or shelf. To make operating easier, a speaker mic can be plugged in.
SMAf to UHFf adaptor Jetstream JT1040, $2.95 from R&L Electronics.
SMAf to UHFf 3 ft cable Jetstream 4010J3, $12.95.
Speaker/Mic Baofeng SM01, $6.95.
 Mobile Transceiver - The TYT TH-7800 dual-band mobile makes a nice small - 5.7 (w) x 1.85 (h) x 7.5 (d) in. - base station transceiver. Output power is 50 Watts on 146 MHz and 35 Watts on the 446 MHz band. It has a dual receiver so you can monitor 2 frequencies at once. Also receives the 108-135 MHz aircraft band, 135-174 MHz and 350-520 MHz. Programming cable included. In place of being powered by the car electrical system, a 13.8 Vdc power supply is used for the base station application. The power supply listed below is ample for the 8 Amp transmit current draw.
 TYT TH-7800 Transceiver $199.95, with RLPS30M power supply $209.95 shipping included.
That's right, just $10 more to add the power supply.
-
Power Supply - There are many mobile transceivers on the market to choose from besides the one shown above as a good example. Which ever one you choose, a good rule of thumb is to run it with a power supply rated at twice the continuous current as the transceiver draws in high power. The 50 Watt class of transceivers typically draw 8-10 Amps requiring a nominal 12 to 14.0 Vdc regulated power supply capable of more than 16 Amps continuous output. Most transceivers as well as power supplies will have fans to keep them cool. Place the transceiver and power supply lifted up a little with rubber or plastic bumpers on the bottom corners if they dont have them, and have nothing adjacent closer than 3 inches to the radio and power supply to insure air flow.
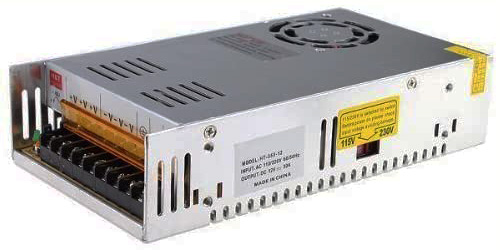 The RLPS30M power supply sold with the TH-7800 above has a Volt/Amp meter and costs $110 if not bought at the same time with the transceiver. A low cost alternative is to use bare-bones modular power supplies like the one shown on right made for powering computers, CCTV and 3D printers. This one can be adjusted for 12.7 Vdc, is capable of 30 Amps and runs $21 on Amazon.
Click on the images to enlarge The domain of this page is Foothillflyers.org
copyright ©2023 Tom O'Hara W6ORG. All rights reserved.
Contact: Webmaster at FoothillFlyers dot org